Tuesday, April 8, 2014

I've re-appeared!


Kids Clothing Week seemed like a pretty good reason to reappear on my little blog.  I have some guesses as to why I've been MIA but the primary is winter.  The winter was HORRIBLE, I basically went into survival mode from January to March.  I took care of the family and house and when I had opportunities to sew I sat and surfed the internet. Many a good quiet times can be lost to Pinterest!  I also started knitting in January too, I've made two cowls and am working on a baby blanket.  The couch was warm and cozy so it called to me this past winter. I've got a few pounds to prove it.


I have, however, persevered and thanks to some much better weather (my mood is pretty weather dependent, I think this comes from being a farm kid.) I have actually been visiting my sewing machine and feeling the need to sew and been more productive overall! :)


Luckily what Peyton needs most for spring and summer are dresses, and if you've followed me at all, I LOVE to sew dresses.  YEAH for me!


This lovely dress by Hanna Anderson has been on my mind since I saw it in their catalog back in late January.  I love the simplicity of it, and the pop of contrast. I just can't bring myself to spend $35 on something I could make.  And without a lot of time spent to do so.  After much pattern deliberation I used this pattern by Patty Young.  It is a quick sew with only 2 pieces and seemed like a quick project.

Maddie

I'll leave out some of my constant inner dialog and give you that stats:
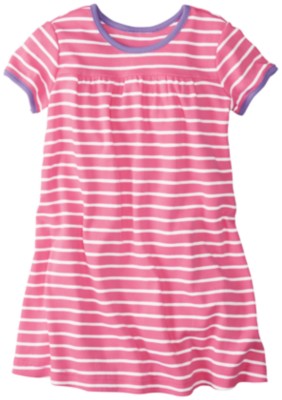
Pattern: Penny by Patty Young
Size: 8
Fabric: a yard of lightweight knit that has been sitting in my stash for way to long.
Alterations:  To achieve the high empire waist of the inspiration dress I used the empire line in the pattern and then took it up some more, like an inch or so and then didn't add the 1/2" seam allowance.  This also helped to shorten the dress to keep it more like the inspiration piece.


I wasn't sure about the dress as I was sewing it. Once I had in on her this morning I liked it much better, and with the fun pop of yellow it really works for me!  I am hoping to get at least one more dress done this week, but we'll see.  :)


Tuesday, November 12, 2013

Basic Dress for 15" Doll

I should have done this long ago, but I'm bringing home my guest post I did over on Nap Time Crafters during her Dressing up Dolly series.  I also have a pair of pajamas for this doll too!  Enjoy!


Cinderella can't hang out in her royal attire all the time.  Well maybe she can, but I certainly can't! :)  My daughter got a  Disney toddler doll for Christmas and she quickly asked me to sew her some other clothes.  My first thought was ugh...doll clothes!  When I saw that Dressing Up Dolly was going on this month it helped motivate me to follow through on her request, which has been more fun than I thought it would be.  I started with some pajamas. You can check out my tutorial for those over here on my blog.


 Today though I want to share this casual summer knit dress I made.  You can download the pattern here.  The dress is very easy to make.  One of the things that makes this dress so easy is the FOE (fold over elastic) I use to bind the neck and arms.  I love FOE it comes in lots of colors and is just fun!


 Okay enough chatting, let's sew.  Below are the pieces you'll need for the dress.   Besides some knit fabric you'll need 15 1/2" of FOE and 6 1/2" of velcro.


Once you've got your pieces cut out, join the shoulders.   I used a 1/4" seam for sewing all my pieces together.  I did use my serger to finish the seams but that isn't necessary.


Now attach the fold over elastic.  Cut a piece that is 7".  I like to find the mid-point of the elastic and pin it in the center of the shirt to help the elastic stretch evenly.  The elastic is shorter than the material, and it will gather the neck up as you attach it.  Use the center fold of the elastic to help place the fabric.  Then sew right along the edge of the fabric to attach it.  Next go back and fold the elastic over and enclose the neckline.  I didn't take a lot of pictures of this.  If you would like some more pictures check out the pajama tutorial I mentioned, it has more pictures of this.  Once the neck is done, do the arms the same way.  Use a 4 1/4" piece of elastic for each arm.


Here is a look at the dress with the elastic on.


We can now sew the sides of the dress.  Again use a 1/4" seam.


Here is the dress once the sides are on.


Next fold and iron a 1/2" under all the way around the sides and bottom, shown in the first picture.  Now we'll hem this all in one step for speed.  Start at the top of the neck and go around to the other side.


All that is left now it to attach the velcro!  You can use normal width velcro, but I cut my 3/4" velcro in half to make a smaller strip.  The width is up to you, however use a length of  6 1/2".  Remember one side goes on top and the other goes under like the picture shows.  (Also I had just a 6" piece here, but you should add the extra 1/2" so it goes all the way to the bottom.)


Here are some other dresses I made.  This pattern could also be shorted into a shirt for more dressing options! :)

Well that's it!  I"m glad Cinderella has some more casual clothes!  :)

Friday, October 18, 2013

Sally Dress

This dress goes back to the summer.  I was super fortunate to be chosen by Shannon of luvinthemommyhood to test the adorable Sally Dress.  I love the look of this dress.  I'm a sucker for vintage/modern looks; and this fit perfectly into that category.  I know we've seen lots of this dress recently but thought it was about time I shared mine.  


I think my reason for being a bad blogger, and not posting this dress earlier is that Peyton is not into this dress. :(  She absolutely will not wear it!  She wore it for pictures and now is unwilling to even entertain the notion of wearing it!  I'm unsure why; but it is a beautiful dress just hanging in her closet.  I don't think I am the only sewing mama this happens to, but it is a bummer. 


Here are the details of my dress.  I sewed up a size 7 and it fit nicely for the most part, a little snug in the bodice/sleeve area, but I think that is my fault.  I didn't do the best job attaching the lining to the sleeves. 


I want to try this dress again, I think I'll make a sleeveless version and see if she likes that more.  Also I should let her pick the fabric too.  We are entering the age where she really wants more of a say in her wardrobe.  (Knit clothing seems to be winning right now.)


It is fun to look back at summer she was only missing one tooth, now all 4 are gone in the front!  Hope you have a great Friday and are planning some fun fall activities for the weekend.


Thursday, October 17, 2013

Peg People

Just a quick post today.  I have about a million crafty things to do, but these little people were begging to be made.  They were very fun and a nice change from sewing.  I have a pinterest board with my inspiration for them.


I want to do some more advanced hair for the ladies next time, I did try a braid out for the little girl.


I am thinking about painting a house like this one, but for right now they are living in a "previously owned" home. :)


If you want to keep up with me make sure you follow me! Bloglovin is proving to be my favorite reader. Click on the link if you aren't already a follower.  Follow my blog with Bloglovin  Tomorrow I'll have another dress to check out.  Happy Fall, hope you have a beautiful day!


Wednesday, October 16, 2013

Another Anywhere Dress

I really do like this dress, it just looks super cute and modern and is SO easy to sew up!  Andrea the creator of Go To Patterns even has the pattern on sale right now.  So go get it, if you don't already have it in your collection!

I blogged about my stripy version of this dress here, which was back in April. It is fun to see the change in our yard from the beginning to the end of the growing season.


 I was able to use the same size (7) this time around so no need to trace out a new size. And I didn't even change the sleeve length, I must really like elbow length! :)


The fabric came from Girl Charlee quite awhile ago, I really like the metallic hearts; they make the fabric have some movement.


The headband I added just because they're cute. I don't think she ever leaves a headband in all day at school, they always come home in her backpack, but they make me smile.  I used this tutorial for it.


She likes to help with her poses these days and thought hiding in our evergreen was a great idea. You can't see much of the dress, but it is kinda cute!


 Love the pop of color with the red salvia.  Hope you are having a great Wednesday!  Thanks for visiting!


Monday, October 14, 2013

Bright Plus Quilt

Do you ever just fall in love with a particular bolt of fabric and just HAVE to figure out something to do with it?  This happens to me from time to time and usually results in a project I didn't even have on my "to do" radar.  When shopping at my local quilt shop during a great sale (buy 10 yards, get 10 yards free) I came across this fantastic print from Rebecca Bischoff's first collection called Blythe


I quickly decided to make a plus quilt since I have been admiring them for quite sometime. I picked up all the fabric for this at the sale. I made my own pattern using 3.5" squares.  The top is mostly Kona cotton solids.  There are a few prints mixed in, they come from my scrap bin and one print from Blythe.  


I've always quilted with my machine and although I love some of the patterns long arms can do, I really prefer straight lines anyway. For this project I sewed a line on each side of the seams a quarter inch each way. I LOVE the texture it added!


 I used another print from the collection for the binding.  It is chevronish, I was thinking I would like it more than I did, but it is fine.


I didn't get a shot of the back I was completely happy with but here is something. :)  


When I took it into my local quilt shop to show off I heard a lady comment that it was a nice "kids quilt".  I admit it did turn out very bright but I really am impressed with the overall effect of the design and I am totally fine curling up with it on my couch on these colder mornings we are beginning to have.


 I have a couple of dresses to blog about later this week so hope you'll check in again soon!

Thursday, October 10, 2013

Back to School Dress


This year I let Peyton chose a pattern and fabric from my stash for her back to school dress.  She started Kindergarten this fall and I wanted to continue my tradition of making her a dress for her first day.  I made this dress during my week of peaches I talked about here,  it was a stretch to get it done but luckily she chose a pattern I've made a few times!


She picked this Simplicity pattern and wanted it with the 3 tiers as shown.  I only had a yard of the fabric she picked but also lucky for me it was from my local fabric shop so it was easy to go grab another half yard!


I only got 1 good picture of her where the whole dress is visible.  It was an easy sew and looked quite cute for her first day!  The fabric is Robert Kaufman 'Spot On' and I made a size 7.


Here is a close up of the sign she held up, where exactly I first saw it I can't remember, but was just what I was wanting!  Here is the link if it trips your trigger too, she has all grades! :)


 She is loving school and happy to get on the bus every morning!